
Polymer clay's are oil-based and therefore must be heated to cure, however, a home oven can be used and a kiln is not required. The baking process varies with each brand so it is always important to check the packaging instructions for each clay. To give you a rough idea, Fimo recommend you bake the clay at 110*C/230*F for 30 minutes. This will also depend on the size and thickness of the clay creation.
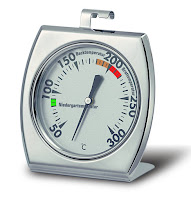 |
| Oven Thermometers Click for more |
takes at least 24 hours to dry. Polymer clay will be plastic like, waterproof and very durable if cured properly. Polymer clay does not harden completely until it is cool so will feel soft to touch when it is taken out of the oven.
Another positive factor for oven baked clay is that it comes in a wide range of colours and effects. This is great if you don't want to paint your creations or you are making a specific creation that needs a certain surface effect such as marbling or granite. If you do want to paint the clay after it has been baked then acrylic paints are one of the best to use, although your clay creation will need to be varnished once the paints dry, in order to protect it.
 |
| Sculpey Premo Pearl Effect Click for more |
Powders such as metallic are also available and can be brushed onto soft clay before baking, which gives great metal or pearl effects. The clay will need to be varnished after baking to protect the effect.
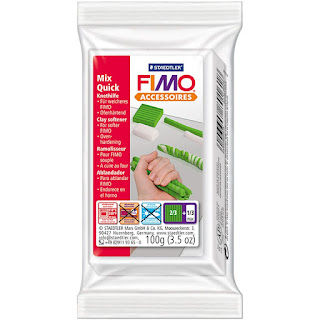 |
| Fimo Mix Quick |
Most oven cured clay's are stiff when first removed from the package and must be kneaded before using. This can take a little time and works better if it is warm, so the more you knead it the warmer it gets and the more pliable it will be. The conditioning time also varies between products as some clay's are softer than others. If you find that the clay is too soft, flatten it between two sheets of white paper and leave for a few hours or overnight. The paper will soak up some of the oils in the clay. If the clay is too stiff then it can be softened by mixing softeners, such as Sculpey Clay Softener or Fimo Mix Quick. It is recommended that you should mix 1 part Mix Quick to 3 parts polymer clay, kneading them together until it reaches the correct consistency.
It is also important to keep your hands clean when handling each colour to prevent colour transfer, so it is a good idea to have some baby wipes to hand, so you can clean your hand quickly and easily.
 |
| Clay Conditioning Machine Click For More |
The list of tools and equipment available to purchase for oven cured clay is endless but if you are just starting out then most of the basic equipment required will probably already be available in your kitchen or tool box.
It is a good idea to have a dedicated work board such as a glass chopping board or a ceramic tile. Something that is smooth, easy to clean and doesn't stick to the clay when it is rolled out.
It's always handy to have baby powder close by when working with polymer clay as it keeps your hands dry and stops the clay from becoming sticky. Make sure you wipe the powder off the clay with a baby wipe or clean damp cloth, before baking it otherwise it may burn onto the clay leaving it blotchy.
 |
| Fimo Tissue Cutting Blades Click for more |
Push molds are also available from a number of retailers and are available in almost any design. Silicone molds also work particularly well with polymer clay as the clay retains the fine detail of the design when it is removed from the mold.
A dedicated rolling pin is a must have and the acrylic or nylon ones work best with this type of clay. Wooden rolling pins can stick to the clay and often become dirty and scratched, which is likely to be transferred onto the clay. It is also possible to buy textured rolling pins that can leave some fantastic patterns on your clay and are great for jewelry decorations.
Texture plates are also available but it is also a good idea to have a look around the house to see what other items could be used for textured patterns. Crocheted doilies are fantastic for delicate details and produce some beautiful patterns.
A lot of the polymer clay sculptures are very similar to sugar craft, which means that sugar
 |
| Sugar Craft Tools |
Other useful items for working with oven baked clay is a baking tray, oven baking paper, baby wipes and kitchen roll.
Polymer clay will fuse together when it is baked so if you are attaching pieces together then only add gentle pressure to both pieces to hold it in place until it is baked. If you want to hide a join then you can smooth more clay over the join, although this will depend on how soft the clay is.
If you want to add two baked pieces of clay together or add findings after baking then the best adhesive is superglue or Apoxie glue. The lighter glues such as PVA can be used for adhering embellishments to the design.
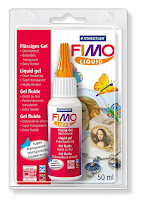 |
| Click to see more liquid clay |
Baked polymer clay does not have to be varnished unless you have added a colouring, although varnishing gives the clay a glossy finish to it. Acrylic or alcohol-based varnish is the best to use as some of the other varnishes, such as oil based varnish never completely dry on polymer clay and the piece with remain sticky.
Don't forget to check out the Oven Baked Clay Review Post for some great advise on which clay works best for each clay creation.
There are hundreds of great tutorials available for oven baked clay, especially on Pinterest and Youtube, so here are a few to start you off:
Kathy Weaver Polymer Clay Tutorials on Pinterest
Graft Gossip - Polymer Clay Tutorials
Insctructables
Creative Sculpey - Youtube
Maive Ferrando Miss Glossy Apple on Youtube
Doll Maker Dream
Polymer Clay Web
Happy Clay Work!